macOS Time Machine: Fix 'Not Available' and 'Out of Space' Errors
Overview
Two frustrating Time Machine errors and how to fix them:
- “Try backing up again when ‘Time Machine’ is available” - even when your backup drive is plugged in
- “Time Machine is out of space” - on a drive you just formatted
This post covers diagnosing both issues, the quick GUI fix, setting quotas via terminal, and the Full Disk Access gotcha that catches everyone.
The Problem
I opened the Time Machine app on my M3 Pro Mac and immediately got a desktop notification:
“Try backing up again when ‘Time Machine’ is available”
The confusing part: My 4TB external drive was connected, mounted, and visible in Finder. The Time Machine volume existed. So why wasn’t it working?
What I Checked First
1. Is the drive actually connected?
1
diskutil list external
Result: Drive was there - a 4TB external with an APFS “Time Machine” volume.
2. Is Time Machine configured?
1
tmutil destinationinfo
Result: Showed a destination was configured:
1
2
3
Name          : Time Machine
Kind          : Local
ID            : 4B5ED0B0-4B3E-4A2F-976E-B302A27937A3
3. Is the volume mounted?
1
mount | grep "Time Machine"
Result: Yes, mounted at /Volumes/Time Machine
4. What’s Time Machine’s status?
1
tmutil status
Result:
1
2
3
4
5
6
Backup session status:
{
    ClientID = "com.apple.backupd";
    Percent = "-1";
    Running = 0;
}
So the drive was connected, mounted, and configured… but Time Machine wasn’t recognizing it properly.
The Root Cause
The Time Machine destination ID in the system configuration didn’t match the actual volume. This can happen when:
- The drive was reformatted
- The volume was recreated
- macOS updated and lost the connection
- The drive was used on a different Mac
The volume was essentially “orphaned” - it existed, but Time Machine’s internal database didn’t recognize it as a valid destination.
My First Attempt (Failed)
I tried to remove and re-add the destination via terminal:
1
sudo tmutil removedestination 4B5ED0B0-4B3E-4A2F-976E-B302A27937A3
Error:
1
2
3
4
tmutil: removedestination requires Full Disk Access privileges.
To allow this operation, select Full Disk Access in the Privacy
tab of the Security & Privacy preference pane, and add Terminal
to the list of applications which are allowed Full Disk Access.
I could have granted Terminal Full Disk Access, but there was an easier way…
The Fix (2 Minutes)
Via System Settings (no terminal needed):
- Open System Settings
- Go to Time Machine (under General)
- Click the minus (-) button to remove the current destination
- Click the plus (+) button to add your Time Machine volume back
- Click Back Up Now
That’s it! The backup started immediately.
What I Should Have Done
Instead of diving into terminal diagnostics, I should have:
- Started with System Settings - The GUI handles permissions automatically
- Removed and re-added the destination - This re-establishes the connection
Lesson: Sometimes the GUI is faster than the CLI, especially when macOS permissions are involved.
Useful Time Machine Commands
For future reference, here are helpful diagnostic commands:
| Task | Command |
|---|---|
| Check destination | tmutil destinationinfo |
| Check backup status | tmutil status |
| List backups | tmutil listbackups |
| Start backup (CLI) | tmutil startbackup |
| Stop backup | tmutil stopbackup |
| Check external drives | diskutil list external |
| Check mount status | mount \| grep "Time Machine" |
Prevention Tips
To avoid this issue in the future:
- Don’t rename Time Machine volumes - Keep the original name
- Safely eject before unplugging - Prevents corruption
- Use the same Mac - Switching Macs can cause destination issues
- Check after macOS updates - Major updates can reset configurations
Quick Diagnostic Flowchart
1
2
3
4
5
6
7
8
9
10
11
12
13
14
15
16
17
18
19
20
21
22
23
24
25
Time Machine not backing up?
           │
           ▼
┌──────────────────────────┐
│ Is the drive connected?  │
│ (Check Finder/diskutil)  │
└────────────┬─────────────┘
             │
        ┌────┴────┐
        │         │
       YES        NO
        │         │
        ▼         ▼
┌──────────┐  ┌───────────────┐
│ Go to    │  │ Connect drive │
│ System   │  │ and try again │
│ Settings │  └───────────────┘
└────┬─────┘
     │
     ▼
┌────────────────────────────┐
│ Remove destination (-)     │
│ Re-add destination (+)     │
│ Click "Back Up Now"        │
└────────────────────────────┘
Key Takeaways
- “Not available” usually means broken link - The destination ID doesn’t match the volume
- GUI fix is faster - System Settings handles permissions automatically
- Remove and re-add - This is the universal Time Machine fix
- Terminal needs Full Disk Access - Extra steps if you want CLI control
Part 2: “Time Machine Is Out of Space” Error
After fixing the initial issue and running my first backup, I got ANOTHER error:
“Time Machine is out of space”
Wait, what? I just formatted the drive! Let me investigate…
Diagnosing the Space Issue
Check APFS Container Details
1
diskutil apfs list disk7
Result:
1
2
3
4
5
6
7
8
9
10
+-- Container disk7
    Size (Capacity Ceiling):      4.1 TB
    Capacity In Use By Volumes:   4.1 TB (100.0% used)
    Capacity Not Allocated:       101 MB (0.0% free)

    +-> Volume disk7s1 - Fanx4TB
        Capacity Consumed:         2.2 TB

    +-> Volume disk7s2 - Time Machine
        Capacity Consumed:         1.9 TB
The problem: Both volumes share the same 4.1TB APFS container with NO size limits!
| Volume | Used |
|---|---|
| Fanx4TB | 2.2 TB |
| Time Machine | 1.9 TB |
| Total | 4.1 TB (100% FULL!) |
Where Are Time Machine Backups Stored?
Time Machine stores backups in TWO locations:
1. External Drive (Primary)
- Path:
/Volumes/Time Machine 1/ - Contains: Full backup history
- My usage: 1.9 TB
2. Local Snapshots (Internal SSD)
- Temporary snapshots on your Mac’s internal drive
- Auto-deleted when space is needed (purgeable)
- Check with:
tmutil listlocalsnapshots /
1
2
# List local snapshots
tmutil listlocalsnapshots /
Output showed 18+ snapshots from the past 24 hours - these are normal and auto-managed.
The Fix: Set a Time Machine Quota
To prevent Time Machine from consuming unlimited space, set a quota:
1
2
3
4
5
# Get your destination ID
tmutil destinationinfo

# Set quota to 1500GB (1.5TB)
sudo tmutil setquota YOUR-DESTINATION-ID 1500
In my case:
1
sudo tmutil setquota B62B3495-6C9E-49F5-B353-314643115DA8 1500
Full Disk Access Required!
If you get this error:
1
tmutil: setquota requires Full Disk Access privileges.
You need to grant Terminal (or your terminal app) Full Disk Access:
- Open System Settings → Privacy & Security → Full Disk Access
- Click the lock icon (enter password)
- Click + button
- Press Cmd + Shift + G and type:
/Applications/Utilities/ - Select Terminal.app and click Open
- IMPORTANT: Quit Terminal completely (Cmd + Q)
- Reopen Terminal - the permission won’t work until you restart!
- Run your command again
Note: The permission change requires a full Terminal restart to take effect. Just closing the window isn’t enough - you must Quit the app entirely.
Updated Commands Reference
| Task | Command |
|---|---|
| Check destination | tmutil destinationinfo |
| Check backup status | tmutil status |
| List backups | tmutil listbackups |
| Set size quota | sudo tmutil setquota DEST_ID SIZE_GB |
| List local snapshots | tmutil listlocalsnapshots / |
| Delete local snapshots | tmutil deletelocalsnapshots / |
| Check APFS container | diskutil apfs list diskX |
| Start backup (CLI) | tmutil startbackup |
| Stop backup | tmutil stopbackup |
APFS Volume Space Sharing Explained
When you create multiple APFS volumes in the same container, they share space dynamically by default. This is usually great - but for Time Machine it can be problematic.
Without quota:
- Time Machine grows until the entire container is full
- Other volumes (like Fanx4TB) compete for the same space
- Result: “Out of space” errors
With quota:
- Time Machine is limited to a specific size (e.g., 1.5TB)
- Automatically deletes old backups to stay under the limit
- Leaves room for other volumes
Key Takeaways
- “Not available” usually means broken link - Remove and re-add in System Settings
- “Out of space” on a new drive - Check if APFS volumes are sharing space
- Set a quota - Use
tmutil setquotato limit Time Machine size - Terminal needs Full Disk Access - Grant it in Privacy & Security settings
- RESTART TERMINAL - Permission changes require a full app restart to take effect
Part 3: The Quota Chicken-and-Egg Problem
After setting the 1.5TB quota, I tried to run a backup:
1
tmutil startbackup
Error: “Time Machine is out of space”
Wait… I just set a quota! Shouldn’t Time Machine automatically thin old backups?
The problem: Time Machine needs free space to CREATE new backup data before it can thin old data. But the disk was 100% full - a classic chicken-and-egg problem!
Why Time Machine Uses More Than Your Drive Size
My M3 Pro has a 1TB internal drive with ~677GB of data. So why was Time Machine using 1.9TB?
Time Machine keeps HISTORY:
- Initial full backup: ~677 GB
- Hourly snapshots for 24 hours
- Daily snapshots for a month
- Weekly snapshots for months
Every file modification creates a new version. Example:
- Edit a 1GB video project 10 times
- Time Machine stores ALL 10 versions = 10GB
This is how “go back in time” recovery works - but it adds up fast!
Manually Cleaning Up Backups
Step 1: List existing backups
1
ls -la "/Volumes/Time Machine 1/" | grep -v Spotlight
My result: 4 backups, all failed!
1
2
3
4
2026-01-11-232811.interrupted
2026-01-12-053256.interrupted
2026-01-12-063302.interrupted
2026-01-12-073310.inprogress
Step 2: Check current disk usage
1
diskutil apfs list disk7 | grep -E "Capacity In Use|Not Allocated"
Result:
1
2
Capacity In Use By Volumes:   4.1 TB (100.0% used)
Capacity Not Allocated:       101 MB (0.0% free)
Zero free space - no wonder backups fail!
Step 3: Delete old interrupted backups
The tmutil delete command didn’t work with the new APFS format:
1
2
3
# This FAILED:
sudo tmutil delete -d "/Volumes/Time Machine 1" -t 2026-01-11-232811
# Error: No such file or directory
What worked: Direct removal with rm -rf:
1
2
3
4
# Delete interrupted backups (keep the newest one!)
sudo rm -rf "/Volumes/Time Machine 1/2026-01-11-232811.interrupted"
sudo rm -rf "/Volumes/Time Machine 1/2026-01-12-053256.interrupted"
sudo rm -rf "/Volumes/Time Machine 1/2026-01-12-063302.interrupted"
Warning: Only delete .interrupted backups - keep your .inprogress or completed backups!
Step 4: Verify space was freed
1
diskutil apfs list disk7 | grep -E "Capacity In Use|Not Allocated"
Result after cleanup:
1
2
Capacity In Use By Volumes:   2.8 TB (69.3% used)
Capacity Not Allocated:       1.3 TB (30.7% free)
1.3 TB freed! Now Time Machine has room to work.
Complete Commands Reference
Here’s every command used in this troubleshooting session:
Diagnostic Commands
| Task | Command |
|---|---|
| Check destination info | tmutil destinationinfo |
| Check backup status | tmutil status |
| List backups (tmutil) | tmutil listbackups |
| List backup folders | ls -la "/Volumes/Time Machine 1/" |
| List external drives | diskutil list external |
| List all disks | diskutil list |
| Check mount status | mount \| grep "Time Machine" |
| Check APFS container (external) | diskutil apfs list disk7 |
| Check APFS container (internal) | diskutil apfs list disk3 |
| Check internal drive info | diskutil info disk0 |
| Quick disk space check | df -h / |
| List local snapshots | tmutil listlocalsnapshots / |
| Check old-style backups | ls -la "/Volumes/Time Machine 1/Backups.backupdb/" |
Action Commands
| Task | Command |
|---|---|
| Start backup | tmutil startbackup |
| Stop backup | tmutil stopbackup |
| Set quota (GB) | sudo tmutil setquota DEST_ID SIZE_GB |
| Remove quota | sudo tmutil setquota DEST_ID 0 |
| Enable Time Machine | sudo tmutil enable |
| Disable Time Machine | sudo tmutil disable |
| Delete local snapshots | tmutil deletelocalsnapshots / |
| Delete specific snapshot | sudo tmutil deletelocalsnapshots / -d YYYY-MM-DD-HHMMSS |
| Remove old backup | sudo rm -rf "/Volumes/Time Machine 1/BACKUP_NAME" |
| Remove destination | sudo tmutil removedestination DEST_ID |
| Add destination | sudo tmutil setdestination "/Volumes/Time Machine" |
Finding Your Disk Numbers
1
2
3
4
5
6
7
8
# Find which disk number is your Time Machine drive
diskutil list external

# Example output shows disk6, disk7, etc.
# Use that number in subsequent commands

# Find your internal Mac SSD disk number
diskutil list internal
Space Check Commands
1
2
3
4
5
6
7
8
9
10
11
12
13
14
15
16
17
# Quick check: How much space on root drive?
df -h /

# Check APFS container free space (external Time Machine)
diskutil apfs list disk7 | grep -E "Capacity In Use|Not Allocated"

# Check internal Mac SSD APFS container
diskutil apfs list disk3 | grep -E "Capacity|Name:|Consumed"

# Check Time Machine volume size specifically
diskutil apfs list disk7 | grep -A5 "Time Machine"

# Check all volumes in a container
diskutil apfs list disk7 | grep "Capacity Consumed"

# Filter backup folders (exclude Spotlight)
ls -la "/Volumes/Time Machine 1/" | grep -v Spotlight
Quota Management
1
2
3
4
5
6
7
8
# View current quota (shown in destinationinfo output)
tmutil destinationinfo

# Set quota to 1.5TB (1500 GB)
sudo tmutil setquota B62B3495-6C9E-49F5-B353-314643115DA8 1500

# Remove quota (set to 0 = unlimited)
sudo tmutil setquota B62B3495-6C9E-49F5-B353-314643115DA8 0
Backup Verification & Restore
| Task | Command |
|---|---|
| Compare current vs backup | tmutil compare |
| Verify backup checksums | tmutil verifychecksums /Volumes/Time\ Machine\ 1/ |
| Restore specific file | tmutil restore /path/to/backup/file /destination/ |
| List what would be backed up | tmutil calculatedrift / |
Troubleshooting Commands
1
2
3
4
5
6
7
8
9
10
11
# Check if Time Machine is currently running
tmutil status | grep Running

# See current backup phase/progress
tmutil status | grep -E "Phase|Percent"

# Check Time Machine logs (last 50 entries)
log show --predicate 'subsystem == "com.apple.TimeMachine"' --last 1h | tail -50

# Force Time Machine to re-index (nuclear option)
sudo tmutil disablelocal && sudo tmutil enablelocal
Final Key Takeaways
- “Not available” error - Remove and re-add destination in System Settings
- “Out of space” error - Check if APFS volumes share space, set a quota
- Quota set but still fails - Disk is 100% full, manually delete old backups first
- Time Machine > source drive - Normal! It stores multiple historical versions
- tmutil delete fails - Use
sudo rm -rfon.interruptedbackup folders - Terminal needs Full Disk Access - Grant permission and RESTART Terminal
- Keep one backup - Always keep at least your newest backup!
The Happy Ending
- Initial fix: 2 minutes (remove/re-add destination in System Settings)
- Space fix: Set 1.5TB quota with
tmutil setquota - Quota verified:
tmutil destinationinfonow showsQuota: 1.5 TB - Manual cleanup: Deleted 3 interrupted backups, freed 1.3TB
- Final state: 1 backup remaining, 30.7% free space
- Backup status: Ready to run successfully within limits
- Data protected: M3 Pro backed up to 4TB external drive
And finally… it’s backing up!
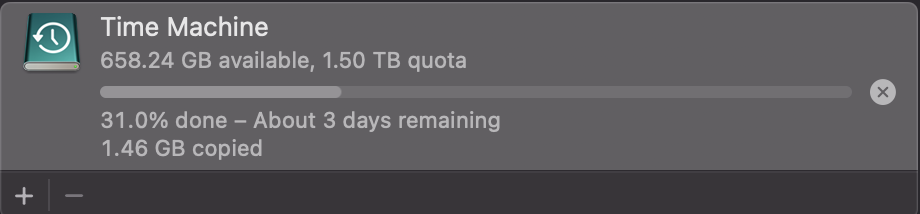 Time Machine says “3 days remaining” - don’t panic! Initial estimates are always wildly inaccurate. This typically drops to a few hours as the backup progresses.
A Note on Time Machine Estimates
When you see “3 days remaining” on your first backup, don’t cancel it! Time Machine estimates are notoriously unreliable:
| What it says | What it usually means |
|---|---|
| “3 days remaining” | 4-8 hours |
| “18 hours remaining” | 2-4 hours |
| “Preparing backup…” | Could be 5 mins or 2 hours |
Tips for faster backups:
- Connect drive directly via Thunderbolt/USB-C (not through a hub)
- Keep Mac plugged into power
- Avoid heavy tasks while backing up
- Let it run overnight
The estimate recalculates constantly - just let it run!
Time Machine is powerful but can be greedy with space. Always set a quota when sharing an APFS container with other volumes!
Part 4: Update - The Hidden Interrupted Backups (Jan 13, 2026)
Even after the previous fixes, Time Machine kept failing with “storage is full” errors. Here’s what happened next…
The Symptoms
- Time Machine backup would start, then fail with “storage full” error
- External SSD showed 1.9 TB free in Finder
- Time Machine partition was formatted yesterday
- Opening Time Machine volume in Finder showed it as completely empty
Wait… empty? But the backup keeps failing due to space? Something’s not right.
The Hidden Truth
Running terminal diagnostics revealed the reality:
1
tmutil destinationinfo
1
2
3
4
5
Name          : Time Machine
Kind          : Local
Mount Point   : /Volumes/Time Machine
ID            : B62B3495-6C9E-49F5-B353-314643115DA8
Quota         : 1.5 TB
1
diskutil apfs list disk5 | grep -E "Capacity|Quota"
1
2
Capacity Consumed:         1450000101376 B (1.5 TB)
Capacity Quota:            1500000002048 B (1.5 TB) (96.7% reached)
The quota was 96.7% full! But Finder showed the volume as empty…
1
df -h "/Volumes/Time Machine"
1
2
Filesystem      Size    Used   Avail Capacity  Mounted on
/dev/disk5s2   1.4Ti   1.3Ti    47Gi    97%    /Volumes/Time Machine
Only 47 GB available out of the 1.5 TB quota!
What Finder Wasn’t Showing
Listing the actual contents via terminal:
1
ls -la "/Volumes/Time Machine/"
1
2
3
4
5
6
7
drwxr-xr-x@  5 root  wheel  160 12 Jan 07:33 2026-01-12-073310.interrupted
drwxr-xr-x@  5 root  wheel  160 12 Jan 13:02 2026-01-12-130247.interrupted
drwxr-xr-x@  5 root  wheel  160 12 Jan 14:36 2026-01-12-143614.interrupted
drwxr-xr-x@  5 root  wheel  160 12 Jan 16:22 2026-01-12-162202.interrupted
drwxr-xr-x@  5 root  wheel  160 12 Jan 18:55 2026-01-12-185545.interrupted
drwxr-xr-x@  5 root  wheel  160 12 Jan 19:59 2026-01-12-195724.interrupted
drwxr-xr-x@  3 root  wheel   96 13 Jan 15:08 2026-01-13-150832.inprogress
SIX interrupted backups were hiding in the volume, invisible to Finder but consuming nearly all the quota space!
Why Finder Showed Empty
This is a quirk of macOS and Time Machine:
- Time Machine backup folders are owned by
root - They may have special extended attributes (
@flag) - Finder sometimes doesn’t display them, especially
.interruptedfolders - The Spotlight index (
.Spotlight-V100) was there but that’s hidden by default
Lesson: Never trust Finder for Time Machine diagnostics. Always use terminal commands!
The Vicious Cycle
Here’s what was happening:
- Time Machine starts backup
- Runs out of space (quota nearly full from previous failed backups)
- Backup marked as
.interrupted - New backup attempt starts
- Even LESS space available now
- Fails faster, leaves MORE interrupted data
- Repeat…
Each failed backup was making the problem worse!
The Fix: Delete Hidden Interrupted Backups
Since the interrupted backups weren’t visible in Finder, I had to remove them via terminal:
1
2
3
4
5
6
7
# Delete all interrupted backups (this takes a while - 1.3+ TB of data!)
sudo rm -rf "/Volumes/Time Machine/2026-01-12-073310.interrupted"
sudo rm -rf "/Volumes/Time Machine/2026-01-12-130247.interrupted"
sudo rm -rf "/Volumes/Time Machine/2026-01-12-143614.interrupted"
sudo rm -rf "/Volumes/Time Machine/2026-01-12-162202.interrupted"
sudo rm -rf "/Volumes/Time Machine/2026-01-12-185545.interrupted"
sudo rm -rf "/Volumes/Time Machine/2026-01-12-195724.interrupted"
Note: This deletion takes a LONG time when removing terabytes of data. Be patient!
Fresh Start: Reformat and Reconfigure
After the rm -rf commands complete, the cleanest approach is:
- Format the Time Machine volume fresh (Disk Utility → Erase)
- Remove Time Machine destination (System Settings → Time Machine → minus button)
- Re-add the freshly formatted volume (plus button)
- Set a reasonable quota (optional but recommended):
1
2
3
4
5
# Get the new destination ID
tmutil destinationinfo

# Set quota (e.g., 1.5 TB)
sudo tmutil setquota YOUR-NEW-DEST-ID 1500
- Start fresh backup
Updated Diagnostic Checklist
When Time Machine says “storage full” but your drive looks empty:
| Check | Command |
|---|---|
| Actual space used | df -h "/Volumes/Time Machine" |
| Hidden files | ls -la "/Volumes/Time Machine/" |
| APFS quota status | diskutil apfs list diskX \| grep -E "Consumed\|Quota" |
| Destination quota | tmutil destinationinfo |
Key Takeaways from Part 4
- Finder lies - It may not show Time Machine backup folders (especially interrupted ones)
- Always use terminal -
ls -lareveals what Finder hides - Interrupted backups accumulate - Each failure leaves data behind
- Check quota percentage -
diskutil apfs listshows actual consumption - When in doubt, format fresh - Sometimes a clean start is faster than cleanup
- rm -rf takes time - Deleting terabytes of data isn’t instant, be patient
The Real Lesson
Just because a drive LOOKS empty doesn’t mean it IS empty. macOS hides a lot from regular users, especially system-level backup data. When troubleshooting storage issues:
1
Trust the terminal, not the GUI.
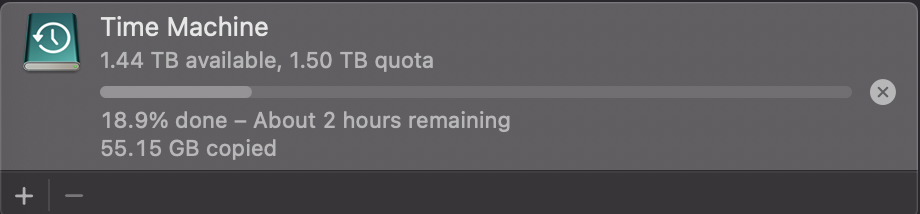
Success! 🎉
After deleting the hidden interrupted backups:
| Status | Value |
|---|---|
| Progress | 18.8% and climbing |
| Time Remaining | ~2 hours |
| Space Available | 1.44 TB |
| Quota | 1.5 TB |
Time Machine automatically started the backup once space was freed - no manual intervention needed! The system was just waiting for room to work.
No reformat required - simply deleting the .interrupted folders was enough to get things moving again.
 Time Machine now showing the 1.5TB quota with plenty of free space - backup in progress!
The Hourly Backup Trap
After deleting the interrupted backups, I discovered another issue: backups were set to hourly!
No wonder the quota filled up so fast. Each hour:
- Time Machine starts a new backup
- Previous backup gets interrupted
- Interrupted backup leaves data behind
- Less space for the next attempt
- Repeat 24 times per day!
The fix: Changed backup frequency from hourly to weekly in System Settings → Time Machine.
Frozen Backup - The Final Boss
Even after cleanup, the current backup froze mid-progress. Time Machine showed it running but nothing was happening.
Solution: Stop the backup manually and delete the frozen .inprogress folder:
1
2
3
4
5
# Check what's there
ls -la "/Volumes/Time Machine/"

# Delete the frozen in-progress backup
sudo rm -rf "/Volumes/Time Machine/2026-01-13-153702.inprogress"
Watch the space free up in real-time:
| Progress | Used | Available |
|---|---|---|
| Start | 56% (782 GB) | 615 GB |
| Deleting… | 39% (539 GB) | 858 GB |
| Deleting… | 35% (477 GB) | 920 GB |
| Complete | ~0% | ~1.5 TB |
The deletion takes time with hundreds of gigabytes, but you can watch the space return using df -h "/Volumes/Time Machine".
Clean Slate Achieved!
After all the cleanup, final verification:
1
ls -la "/Volumes/Time Machine/" | grep -v Spotlight
1
2
drwxrwxr-x@ 3 root    wheel   96 13 Jan 18:45 .
drwxr-xr-x  7 root    wheel  224 13 Jan 15:06 ..
Empty! No more interrupted or frozen backups.
1
df -h "/Volumes/Time Machine"
1
2
Filesystem      Size    Used   Avail Capacity iused  Mounted on
/dev/disk5s2   1.4Ti   772Ki   1.4Ti     1%     100   /Volumes/Time Machine
| Final Status | Value |
|---|---|
| Backup folders | 0 (completely empty) |
| Space used | 772 KB (just metadata) |
| Space available | 1.5 TB |
| Capacity | 1% |
Understanding APFS Shared Space
If you’re wondering where your disk space went, remember that APFS volumes share container space:
1
diskutil apfs list disk5
1
2
3
4
Container disk5 - Total: 4.1 TB
├── Fanx4TB:        2.2 TB consumed
├── Time Machine:   790 KB consumed (empty!)
└── Free Space:     1.9 TB available
The Time Machine volume has a 1.5 TB quota, so it can only use up to that amount even though the container has 1.9 TB free. This prevents Time Machine from eating into your other partition’s space.
Final Summary: The Complete Fix Journey
| Problem | Solution |
|---|---|
| “Not available” error | Remove and re-add destination in System Settings |
| “Out of space” error | Set quota with tmutil setquota |
| Quota full but disk looks empty | Delete hidden .interrupted folders via terminal |
| Hourly backups filling quota | Change to weekly backups |
Frozen .inprogress backup | Stop backup and rm -rf the folder |
| Finder shows empty but terminal shows files | Trust the terminal, not the GUI |
Ready for Fresh Backup!
With 1.5 TB of clean space and weekly backup schedule, Time Machine is finally ready to complete a backup successfully.
System Settings → Time Machine → Back Up Now
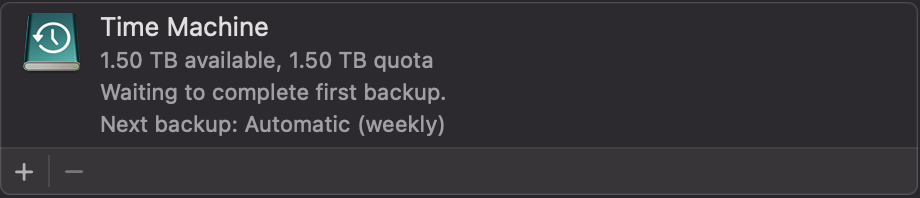 Clean slate! Time Machine showing 1.5 TB quota with full space available - ready to start fresh backup.
This time it will actually finish! 🎉
Success - Backup In Progress!
After all the troubleshooting, the backup is finally running properly:
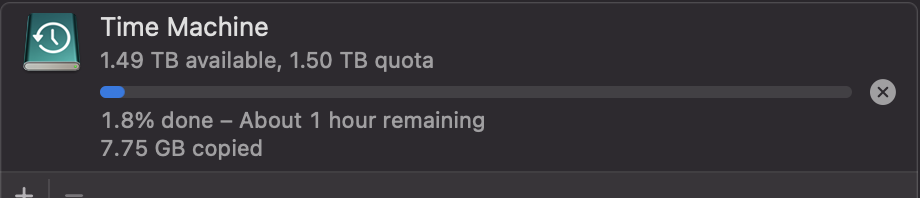 Time Machine backup in progress - 1 hour remaining. It’s actually going to complete this time!
No more “storage full” errors. No more frozen backups. Just a clean, working Time Machine doing its job.
First Backup Progress - A Few Hours In
First full backups take time. Here’s the status after a few hours:
1
tmutil status
| Stat | Value |
|---|---|
| Phase | Copying (working!) |
| Progress | 23.64% |
| Time Remaining | ~5.5 hours |
| Files Done | 1,202,488 of 6,143,749 |
| Data Done | ~154 GB of ~672 GB |
| Space Used | 621 GB |
| Space Available | 776 GB |
Key insight: The total backup size is ~672 GB - comfortably within the 1.5 TB quota.
 First full backup in progress - 23.64% done with ~5.5 hours remaining. The backup is actually working!
Why First Backups Are Slow
The initial Time Machine backup has to:
- Scan 6+ million files on your Mac
- Copy every single file to the backup drive
- Create the backup structure and metadata
- Calculate checksums for verification
This takes hours, even on fast SSDs. But here’s the good news:
After the first backup, weekly backups only copy CHANGED files. If you edit 10 documents during the week, Time Machine only backs up those 10 files - not all 6 million again.
Tips While Waiting
- Keep your Mac plugged in - Don’t let it sleep
- Avoid heavy tasks - Let Time Machine have the disk bandwidth
- Don’t disconnect the drive - Interrupted backups waste space
- Let it run overnight - Go to bed, wake up to a completed backup
BACKUP COMPLETE! 🎉
After all the troubleshooting, the first full backup finally completed successfully!
 The notification we’ve been waiting for - Time Machine backup completed successfully!
Final Statistics:
| Stat | Value |
|---|---|
| Total Backup Size | 1.1 TB |
| Space Remaining | 263 GB |
| Quota Used | 82% of 1.5 TB |
| Time to Complete | ~5.5 hours |
| Files Backed Up | 6+ million |
| Status | SUCCESS! ✅ |
Timeline:
- Backup started: 18:47 (Jan 13, 2026)
- Backup completed: 00:21 (Jan 14, 2026)
- Total duration: Approximately 5.5 hours
What’s Next?
With the first full backup complete:
- Weekly backups will now only take minutes (not hours)
- Only changed files get backed up going forward
- 263 GB headroom for future backup growth
- Time Machine will auto-thin old backups when space runs low
Your M3 Pro is now protected! If disaster strikes, you can restore everything from this backup.
The Complete Journey Summary
What started as a simple “Not Available” error turned into a deep dive into Time Machine troubleshooting:
- ❌ “Not Available” error → ✅ Remove/re-add destination
- ❌ “Out of Space” error → ✅ Set 1.5 TB quota
- ❌ Hidden interrupted backups → ✅ Delete via terminal (Finder lied!)
- ❌ Hourly backups filling quota → ✅ Changed to weekly
- ❌ Frozen in-progress backup → ✅ Manual rm -rf cleanup
- ✅ Fresh backup started and COMPLETED!
Total troubleshooting time: ~2 days Result: 1.1 TB backup of M3 Pro, running smoothly
Final Update (Jan 14, 2026): BACKUP COMPLETE! First full Time Machine backup finished successfully on M3 Pro - 1.1 TB backed up in ~5.5 hours with 263 GB to spare. The saga is over!